
I joined another "thing". I couldn't help myself. Abby Dodge does #baketogether and this month it was a Peasant Boule. I love making bread. I jumped on the baking bandwagon and I am sure glad that I did. I started off by making the recipe "as written so I could taste what it was suppose to taste like.

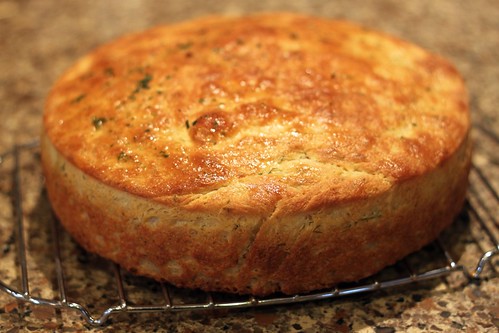
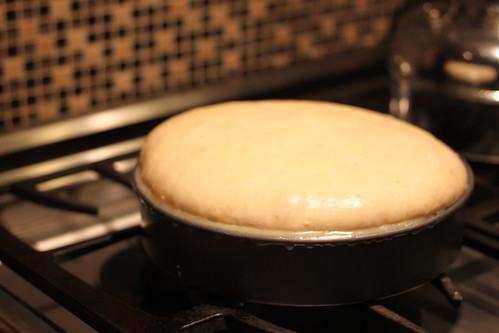
My first attempt went fairly well. Well, maybe not totally but I will show you what I mean...

It sort of burped up a bubble and I stood there looking at it and talking to myself:
Janis: Bread, why do you always do crap like this to me? Why can't you ever just be pretty?
Bread: No answer
Janis: I did everything exactly as the recipe said.
Bread: No answer
Janis: Oh forget it. I bet you will taste good anyhow.

It did. I also tried to take "professional pictures" of it. Dr. Food bought me a new flash and also a tripod and little tent thing.
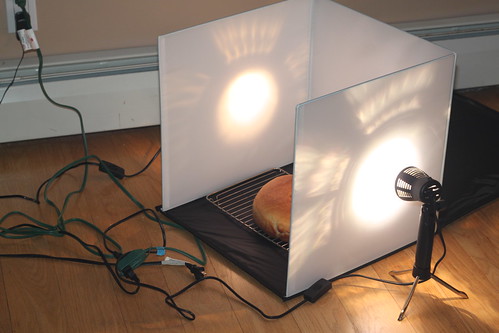
What? I am not suppose to take a picture of the whole set up? Pffft. Do I look dumb? (don't answer that). I didn't like the picture in the circus tent sent up.

Shhh. Play along with me here... Dr. Food, I love my little photo tent that you bought me. You are the best husband in the world... Ok lets move on.
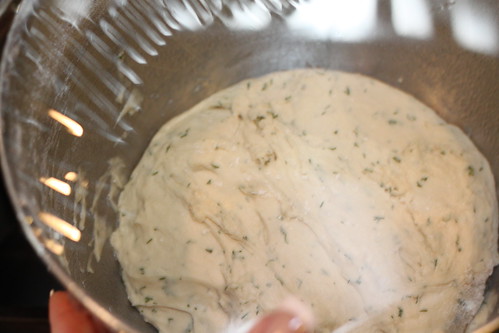
I made Bread number 2 and decided to add my own twist. I did everything the same but I added a roasted garlic and dill. This bread was awesome. I loved it.
This bread will most certainly be a staple in the house from now on.
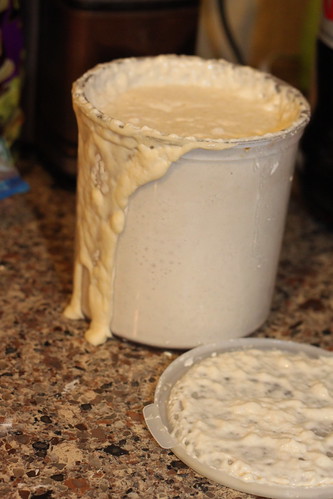
I took it one step further and activated "Goo" my sourdough starter.
I made a sponge and then reduced the amount of flour to include what was in the sponge when I actually went to make the bread. I had let the sponge sit in a warm place for 5 hours.

Prettttty! It tasted good too but #2 bread was my favorite.
I saved some for Dr. Food for when he comes back from Switzerland tonight. REMEBER...ixnay on the photo tent-ay.
Abby Dodge's Peasant Boule
Printable Version
Makes 1 round loaf; 8-10 servings.
3 1/3 cups (15 ounces) all purpose flour
1 packet (1/4 ounce) instant yeast (Rapid Rise)
2 tablespoons granulated sugar
1 1/2 teaspoons table salt
1 1/2 teaspoons baking powder
1 1/3 cups very warm water (between 115 and 125 degrees)
3 tablespoons unsalted butter, melted
1. In a large bowl of electric stand mixer, whisk the flour, yeast, sugar, salt and baking powder. Clip the bowl into the mixer stand and fit the mixer with the dough hook.
2. Check that the water temperature registers about 120 degrees on an instant-read thermometer. (In order for this type of yeast to grow, the liquid needs to be between 115 and 125 degrees.)
3. With mixer on medium-low speed, slowly pour the water into the flour and mix until the flour is completely incorporated. Increase the speed to medium and beat until the dough is smooth and pulls away from the bottom and sides of the bowl, about 6 minutes. Don’t venture too far away while it’s mixing as the mixer might dance around on the counter.
4. Scoop up the dough and shape it into a ball. Lightly grease (using some of the melted butter or spray release) the bottom and sides of the mixing bowl and pop the dough, rounded side up, back into the bowl. Cover the top securely with plastic wrap. (I like to use a large rubber band to hold the plastic in place.) Let the covered dough rise in a warm spot until doubled in size, about 45 minutes.
5. Using some of the melted butter, generously butter an 8-inch round cake pan. Turn the dough out onto a clean work surface (there’s no need to flour—the dough is soft but not sticky) and press to deflate it. Shape the dough into a 7-inch-wide round and place it, smooth side up, in the center of the prepared pan. Generously brush the top and sides with some of the melted butter. You may not need all the butter.
6. Let the dough rise (no need to cover it) in a warm spot until doubled in size, about 25 minutes. It will fill the pan.
7. About 15 minutes before the dough is ready to bake, position a rack in the middle of the oven and the oven to 375°F. When the dough has risen to about 2 inches above the edge of the pan, bake until the boule is well browned and sounds hollow when tapped about 40 minutes. Transfer the pan to a rack and tip the baked bread onto a rack and remove the pan. Set it right side up and let cool completely.
I'm glad you joined us Janis; not only are you a talented baker, but hoping this will ease the pain of the end of charcutepalooza! Plus I love the commentary. Ixnay it isnay. Or whateveray.
ReplyDeleteThanks Barb. Yeast is my new BFF!
ReplyDeleteYou know, I could really use that circus tent, as you call it. Lighting is my downfall! Where do you get one of those?
ReplyDeleteFrank...Rich got me this
ReplyDeletehttp://www.cowboystudio.com/product/c10/p10-03.php
I love the preciseness of bread baking... maybe it's time I join #baketogether as well. I need something that gets me back into the swing of things. Love the little lightbox by the way! :-)
ReplyDeleteMy husband bought the tent setup as well and keeps asking when I'm going start using it. I was diplomatic about it when I said, "it's not a freakin kitchen! It looks like I'm baking in the tardis!" His reply? eyeroll.
ReplyDeleteBread looks great. Nothing better than good bread.
You're inspirational Janis! I'll be trying a sourdough starter soon too! And baking this bread again!
ReplyDeleteLooks fantastic!
ReplyDeleteAnd the bubble cracks me up, haha. Definitely know those moments.
The pictures look great, I really need to get myself educated on photography...
Laughing out loud. Just bought the same photo tent...watch out because the bulb pops if you tip the light over!
ReplyDeleteThanks for the tip ;--)
ReplyDeleteThe starter is easy and fun. Just takes time.
ReplyDeleteSo funny! And your bread looks fantastic too! I have that same little salt pig on my countertop. So cute. This is a great bread recipe. I definitely will be making it again.
ReplyDeleteSo that's the secret to fantastic food photos! I've been trying to take some for my blog but I couldn't figure out how to get the lighting right. Funny but also helpful - thanks!
ReplyDeleteThis is my first ticket to the show. Its was funny. I really laughed and I especially liked the sequence where you had dialogue with the mute bread. I don't understand why the bread snubbed you. After all you gave it life. hmmm I will say the show was worth the ticket price and I would love to come back for a visit. Keep up the good work. I'm sure there will be sequels and I loved the tent photo. Who knew, right?
ReplyDelete